Garden Composting 101: Recycling Waste Into Fertilizer
What is Composting?
Composting is a simple method for gardeners to recycle waste materials from their yard, kitchen, and garden into a fertilizer that enriches soil. By mixing various ingredients using water, air, and heat, microbes break the materials down, in the process promoting a nutrient-rich final product.
Composting has experienced a resurgence in attention and popularity for several reasons:
- It reduces food and yard waste, which would otherwise go to landfills.
- Compost is better fertilizer for garden soil because it contains a wider spectrum of microorganisms, enzymes, and vitamins.
- It works as a slow release fertilizer for longer feeding.
- It improves soil structure, moisture content, beneficial bacteria and fungi (which may prevent soil pathogens that harm plants), and balances soil pH.
- Even if you don’t have a big garden, it’s useful for spreading around trees, putting on your lawn, and mixing into used potting soil.
- Since compost is organic and natural there is less worry about fertilizer run-off.
Here you can learn the basics of starting your first compost pile or bin and improve soil using your own recycled materials
Choose a Location
The best location for your compost pile or bin really depends on your yard or garden. It should be situated at the very least near a water source, the spot itself should be as dry as possible, and shade is preferred but not required. While compost piles—if managed correctly—aren’t particularly pungent or attract too many insects, it’s probably best to not situate it near seating or play areas. It should be easily accessible, however, for dumping yard and kitchen waste.
Create the Composting Area
The best budget-friendly method of composting is starting it directly in—or on—the ground. You can either:
- create a trench near the area you want to amend and then burying your materials, this is useful if you have a lot of material to compost at once
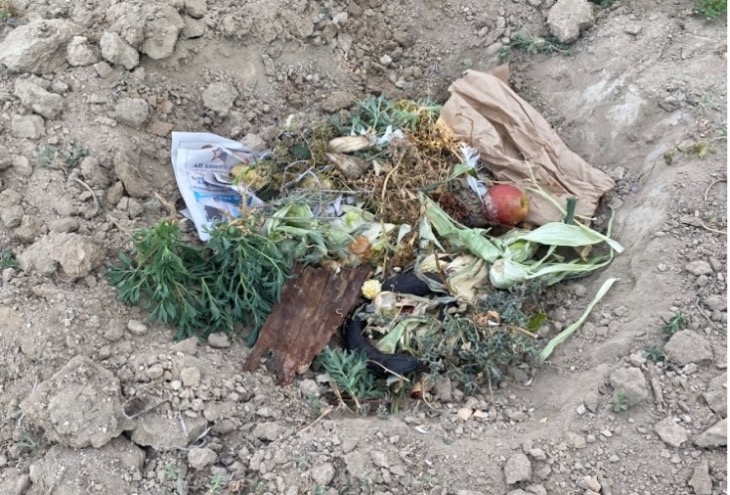
- or create a hole in the ground where water won’t collect, also known as “guerilla composting“ (see picture).
Before you dig, if you don’t know where any underground lines and utilities may run, make sure to call 811 and they will come mark the lines for free.
A variety of containers can be used for composting, but the most important aspect of any container is airflow and the ability to drain water. Another thing to consider is how easily you’ll be able to turn the compost, especially if you want quicker processing time. Here are a few ideas.
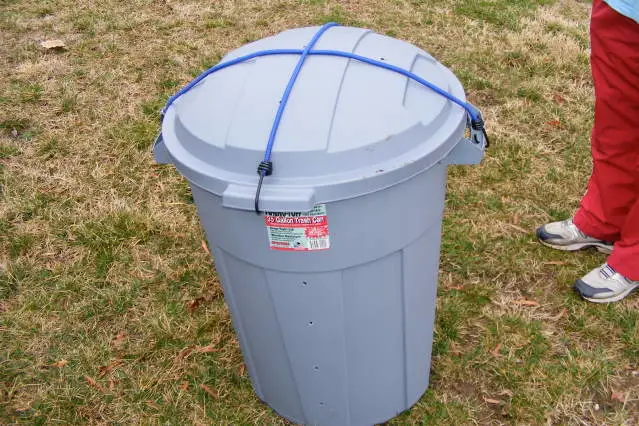
Garbage Can Compost Bin
Inexpensive and simple to make, a garbage can compost bin makes for faster decomposition because it’s easy to turn simply by rolling it on the ground. It takes up less space, you can move it where you need it, and there’s less smell and bugs. However, once it’s full, it’s difficult to add more because it slows down overall decomposition, and depending on the quality the bin may not last more than a few seasons.
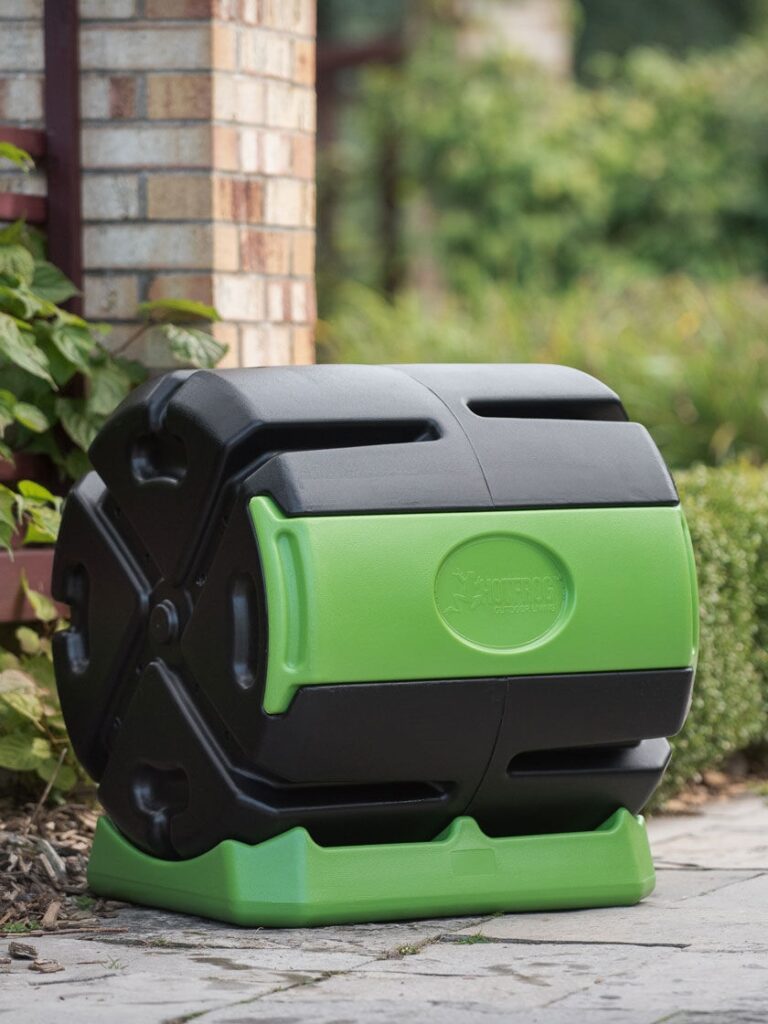
Compost Tumbler
The benefits of good quality tumblers is that they last several seasons, many of them have reservoirs in the base for making compost tea, and they can be located anywhere. Compost can be made in a matter of months, but the batches will be smaller.
There are also DIY tumbler instructions available on YouTube, such as this Home-Made Compost Tumbler.
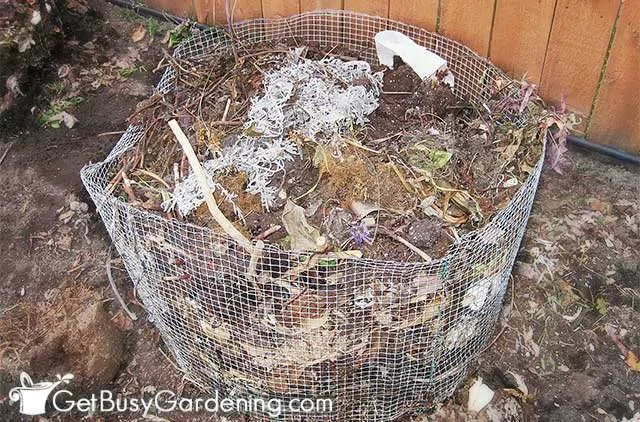
Wire Mesh Compost Bin
Wire bins can be inexpensive and have air-flow built in to the material. They’re easy to set into your choice of location and the size is customizable. It can be a little bit harder to mix so may be more suitable for cold composting, but the materials are contained and will decompose into each other over time. Wire bins can be purchased already made or you can create one from rolls wire such as chicken wire, usually available for purchase at building supply centers.
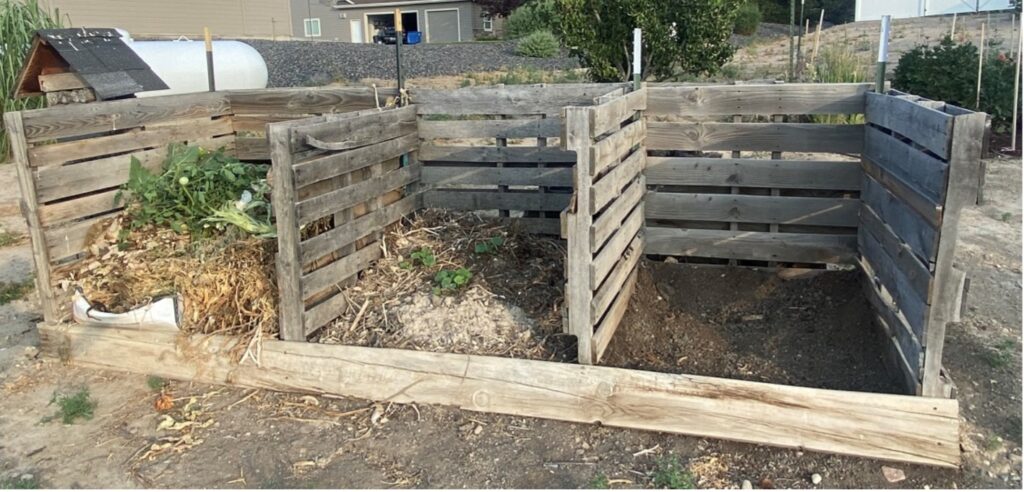
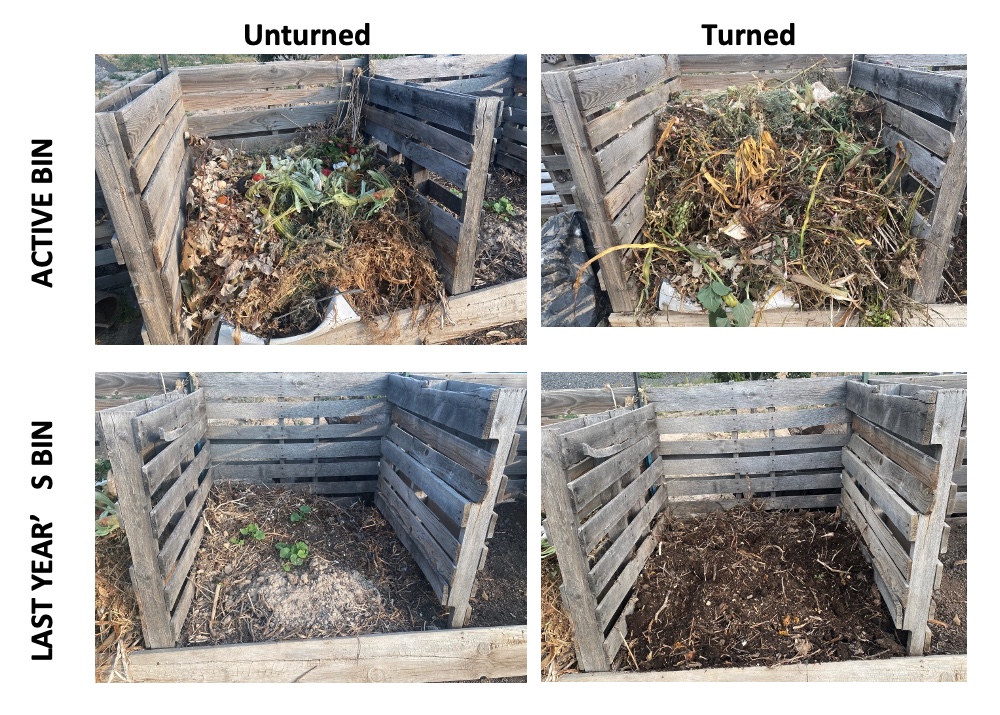
Multiple Bin System
This pallet and t-post 3-bin cold compost setup is a lower effort method because this gardener dumps all the materials for the year in one side with minimal mixing. The following year it sits and decomposes, then is mixed at the gardener’s convenience. By the end of the second or third year it should be ready to be used. It’s easy to find online instructions for pallet compost bins that cater to individual skill level and functionality requirements. Make sure any pallets and wood you use are untreated.
Collect the Composting Materials
Gardeners can collect composting materials year-round, especially if they cook at home and keep the peels and other waste. Kitchen collection containers don’t have to be fancy, especially if you’re in the habit of frequent dumping, a simple bowl will do. However, there are containers with filters and lids to prevent bugs and smell that you can store on the counter or under the sink until you’re ready to empty it.
The most active collection season is in the spring and fall when yard waste comes from trimming and pruning, but yard waste can be added year-round in some climates.
Typically the carbon-to-nitrogen ratio when composting is 25:1, but don’t stress the ratio if you’re keeping an active pile, experience will be your teacher here about how wet or dry it needs to be. Here’s a list of what’s safe and not safe to add to your compost pile.
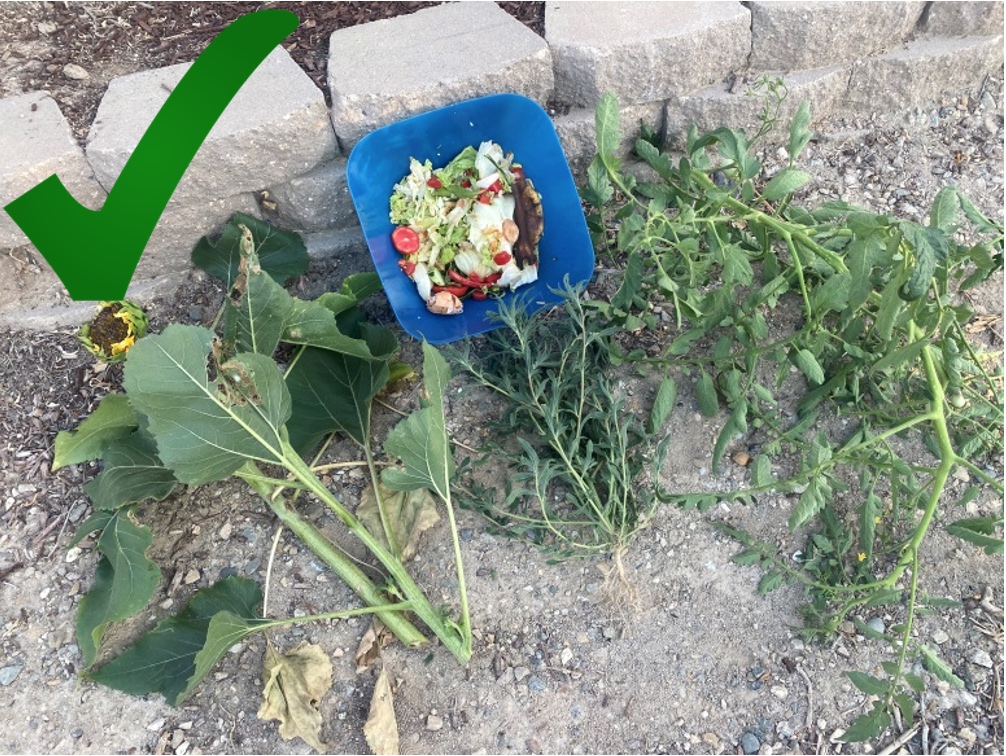
Green/Wet (Carbon) Waste:
- Yard trimmings
- Leaves
- Grass clippings
- Fruit and vegetables peels and waste
- Coffee grounds
- Eggshells (crushed)
- Cooked food without oil, dairy, or meat
- Rice and grains
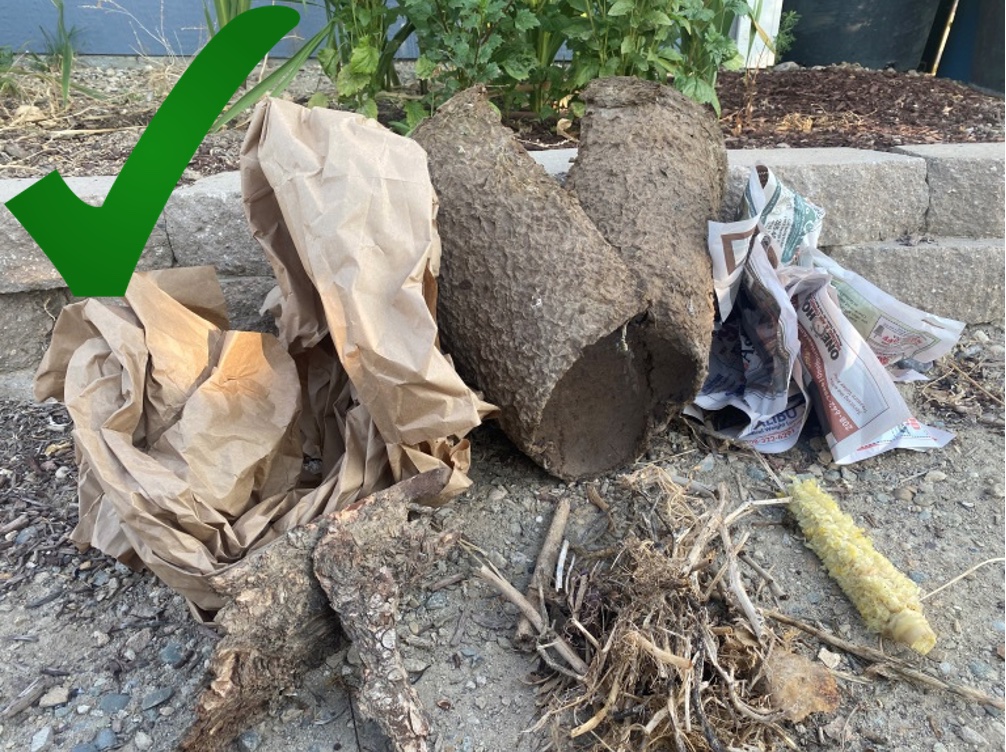
Dry (Nitrogen) Waste:
- Newspaper and other paper products
- Cardboard
- Used potting soil and recyclable pots
- Hay and straw
- Hair, fur, and lint
- Nut shells
- Sawdust and wood shavings
- Pine needles
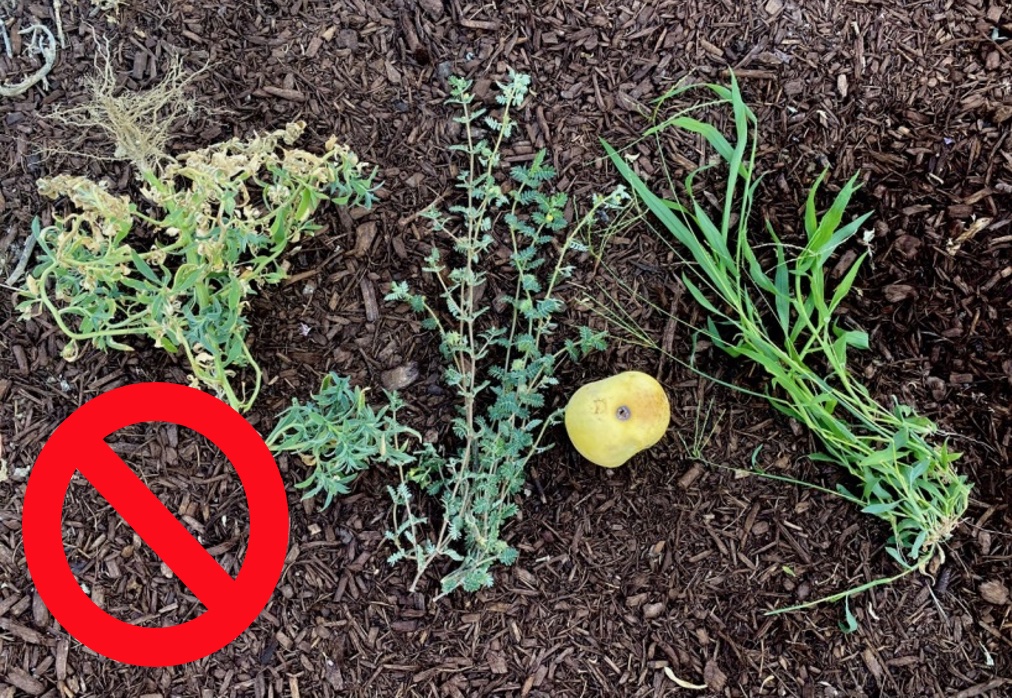
Avoid (attracts animals and pests, spreads disease or unwanted seeds, etc.):
- Meat and fish
- Bones
- Dairy
- Oils
- Food cooked food with dairy and meat
- Weeds blooming or going to seed
- Noxious weeds (such as field bindweed or creeping charlie)
- Items infested with disease or insects
- Pesticide-treated weeds or fruit
Compost Maintenance
Now that you’re created your compost pile or bin and have been filling it with materials, the next step is to maintain it. Compost maintenance falls into two general categories: hot or cold.
Hot composting means frequent mixing (or aerating) and keeping the wet-to-dry ratio consistent for best decomposition. This method requires the most frequent attention, but it also means you can have a finished product ready to use in a matter of weeks or months.
- Turn the compost frequently—every time you introduce new materials, daily if possible, or several times a week. This introduces new materials so that they can break down, generate heat, and accelerate the decomposition process.
- Cutting the materials into smaller pieces speeds up the process. For example, chop up your watermelon rinds, corn cobs, or plant stems into smaller pieces to help them break down.
- Hot compost attracts fewer bugs because if it’s hot enough they won’t survive the temperatures. Same goes for errant weed seeds and plant diseases.
Cold composting uses less turning compared to hot composting. Simply continue to pile more materials as they become available and turn when it’s convenient. However, cold composting can take anywhere from six months to a year+ depending on the size of the pile. If you have a lot of space to work with as well as a lot of material during the active growing season, this method requires the least time and effort.
Other Composting Tips
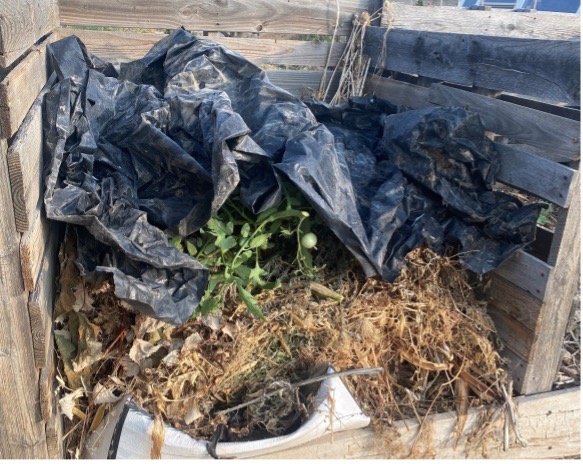
- Drier climates may require a sprinkle of water every few days to keep the pile moist enough to generate heat. Wetter climates may need to be covered with plastic or a lid to protect it from mold.
- Sometimes adding poor garden soil or used potting soil by mixing it into the compost pile—especially if it’s too wet—helps make the final product finer.
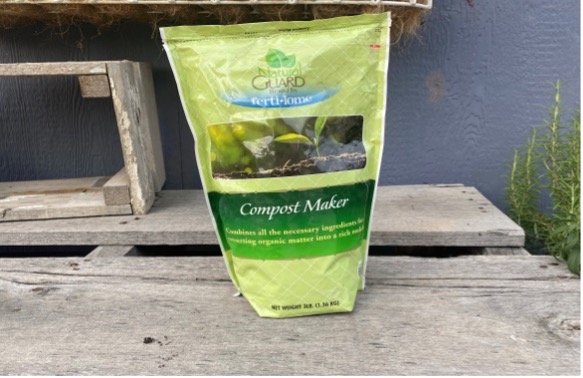
- Compost activator speeds up the breakdown of garden and household materials when you add it and mix it into a compost pile. There are a variety of products available at nurseries or home garden centers.
Using Finished Compost
Once your compost has broken down into a clumpy consistence where the contents are mostly unrecognizable, it’s ready to be used. The best time to use it is in the fall, such as in a vegetable garden after it has been pulled out. Mix the compost into the soil to finish decomposing over the winter, then the beds will be pre-fertilized for spring. Spring is a good time to add compost to anything actively growing, such as flowerbeds, shrubs, trees (especially fruit trees), lawn, and even in pots with depleted potting soil. You can lay it down as thick as 1” and unlike fertilizer you don’t have to worry about using too much burning your plants.
This pile in a cold compost bin is from last year’s trimmings and will be ready in a few months to be mixed into the vegetable garden beds, where it will finish breaking down and amend the soil for spring planting.
Continue the Learning Process
Composting can be a messy process but if you keep it simple and jump right in, your best instructor is experience. While most of the ‘rules’ refine the process, it’s more important to get started and learn as you go. Considering the benefits of compost to your yard and garden, it’s worth the effort. There are so many great books and websites with the finer details of composting if you’re eager to learn more.