5 Home Improvement Projects for the Fall

While summer is the time for new birth, autumn signals a winding down of the year, cooler temperatures, and the beginning of the end of your plants’ seasonal blooms.
In the fall, take the time to clean up your property from summer and prepare your lawn and flora to survive winter and to respawn healthier and fuller next spring. For at-home or professional gardeners, fall isn’t as busy of a season as spring or summer. Take advantage of the time you would normally spend watering or weeding and tackle one of these 5 home improvement projects for fall.
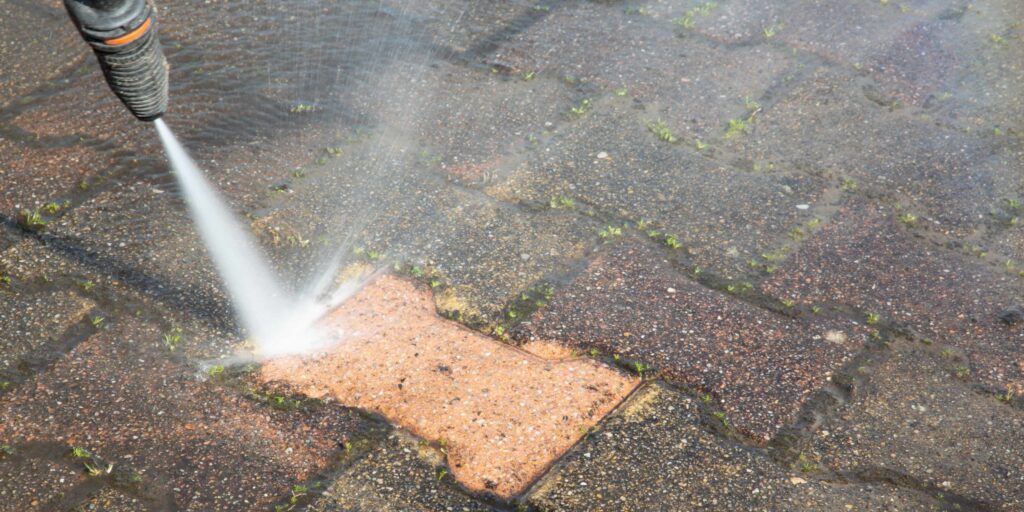
1. PRESSURE WASH
DIFFICULTY: BEGINNER
TOOLS: PRESSURE WASHER, SCRUB BRUSH
SUPPLIES: CLEANING SOLUTION, LADDER (IF NEEDED)
Whether you get it done professionally or do it yourself, there are plenty of reasons to pressure wash your patio, deck, or driveway this fall – if you haven’t in a while, if the surface is noticeably off-colored or dirty, to winterize, etc.
Ideally, outdoor surfaces should be pressure washed yearly to remove the stuck-on debris, mildew, and stains that accrued over the seasons. It’s truly shocking the difference a simple pressure washing can make to your outdoor brick, wood, stone, or cement space. Pressure washing is exactly what it sounds like – you use a highly pressurized water gun to clean dirt and moss from your surfaces. You can even pressure wash the siding of your house, outdoor furniture, or windows to freshen up the entire outside – and preserve the lifespan – of your home. If you’re curious about how to wash your home’s exterior, check out Mobile Magic Pressure Washing’s ‘Fall Pressure Washing Tips‘ for more insight.
To start, you’ll need a pressure washer and a mildewcide-detergent solution. You can purchase or rent one from home improvement stores, or you can entirely outsource the job to a professional service. Always use caution while pressure washing, especially if you’ve never used one before.
If you have no experience with a pressure washer, be sure to try out this cleaning method on concrete first so that you get used to the recoil and power of your washer. The detergent, available for purchase at lawn and garden stores, acts as the cleaning ingredient and should be mixed with water and a little bit of bleach. Professionals suggest that you wash “up” your house, meaning that after you spray your wall with solution, start at the bottom of your wall and use a scrub brush to scrub up and break apart any stuck-on mildew.
Keep these safety tips in mind while doing this project:
- Don’t wash while standing on a ladder. The washer recoil could send you flying backward.
- Close or cover any outdoor plug outlet with duct tape. Water and electricity don’t mix.
- Wear safety goggles to protect your eyes from water or projectiles.
- Do not spray anyone or anything that you don’t want to be damaged with the pressure washer. The high-powered water can cut through skin and should only be used to take off stuck-on grime.
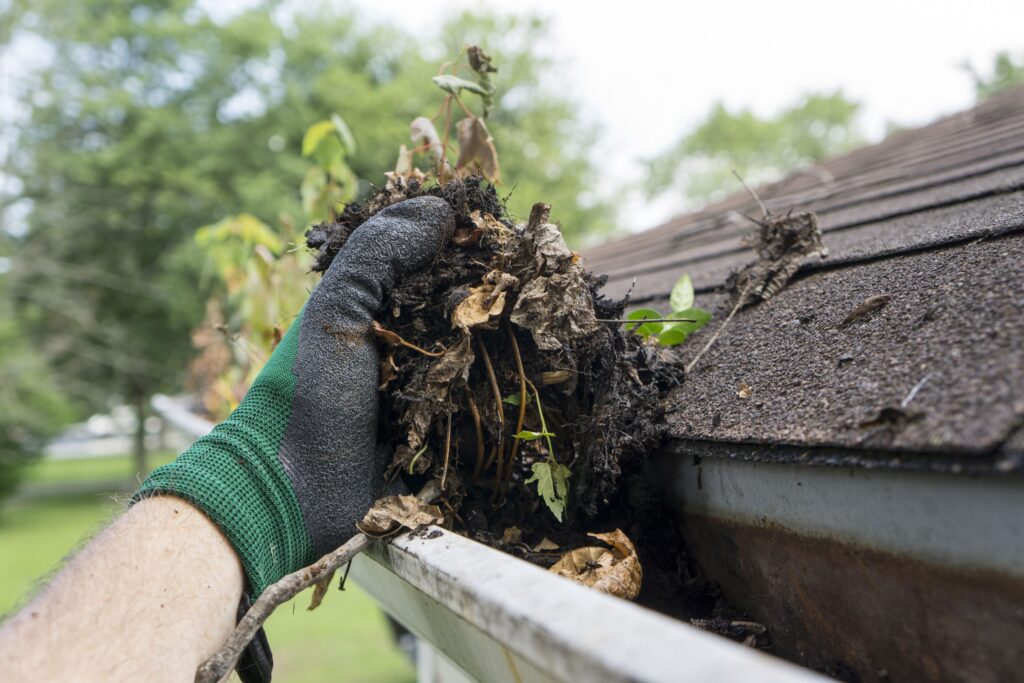
2. CLEAN OUT AND REPAIR GUTTERS
DIFFICULTY: BEGINNER
TOOLS: WORK GLOVES
SUPPLIES: LADDER, LEAF/DEBRIS RECEPTACLE
Gutters can easily become clogged with leaves during fall, and if they remain in winter, beautiful autumn leaves can cause water damage to your home and roof, costly repairs, and a nightmare to deal with when snow piles up.
If you have trees close to your home, chances are the strong autumn winds will push a lot of leaves on top of your roof and into your gutters. If these leaves are rained on, they leave a soggy mess and don’t allow the rain to flow freely through the gutter, down the downspout, and away from your home’s foundation. Before winter, it’s supremely important to remove these clogs to prevent damage to your foundation because when water can’t flow correctly, it pools around the base of your home causing cracks. This crack will freeze and expand during winter leading to a major issue.
And cleaning your gutters won’t only prevent your home from water damage, it can also protect against pest and mold damage. Organic material like leaves make comfy homes for rodents, termites, and insects and with plenty of food and stagnant water around, more are bound to infest. You don’t want these near your home, let alone in your home, so take the necessary steps to prevent them.
But most important – make sure you’re able to do it safely. If you don’t want to climb a ladder and scale your roof or if you’re not able to, hire a professional company to do it for you. The money you spend on your gutter maintenance will be far less than what you have to spend to repair any serious damages.
3. CHECK YOUR INSULATION

DIFFICULTY: BEGINNER
TOOLS: UTILITY KNIFE/SCISSORS
SUPPLIES: WEATHERSTRIPPING
Checking your home’s insulation before winter will prevent you from living in an icebox come December. Poor insulation in your walls, around the crevices of your doors and window, and in your garage can cool your house while raising your heating bills. If heat can escape easily out of walls, ceilings, and floors, you’ll need a lot more heat running through your house to make it a comfortable temperature to live in. Your insulation should be checked annually before the freezing temperatures set in in your region to leave enough time for any repairs to be made.
Installing insulation can be done professionally or by a knowledgeable at-home professional, but weatherstripping is a quick and inexpensive fix for any homeowner experiencing air leaks. Weatherstripping is a self-adhesive, insulating sticker that prevents cold air from entering through the narrow cracks around windows and doors.
The type of weatherstripping – foam, V strip, felt, and tubular rubber, vinyl, or silicone – you choose is dependent on your style of door or window. Door sweeps are another form of weatherstripping that is installed at the bottom of your door to prevent lower drafts and ground-level pests, dirt, and moisture off your floor and out of your home. If you’re shopping for weather stripping, read Grainger’s Types of Door Weatherstripping and Thresholds to find which type is best for your home.
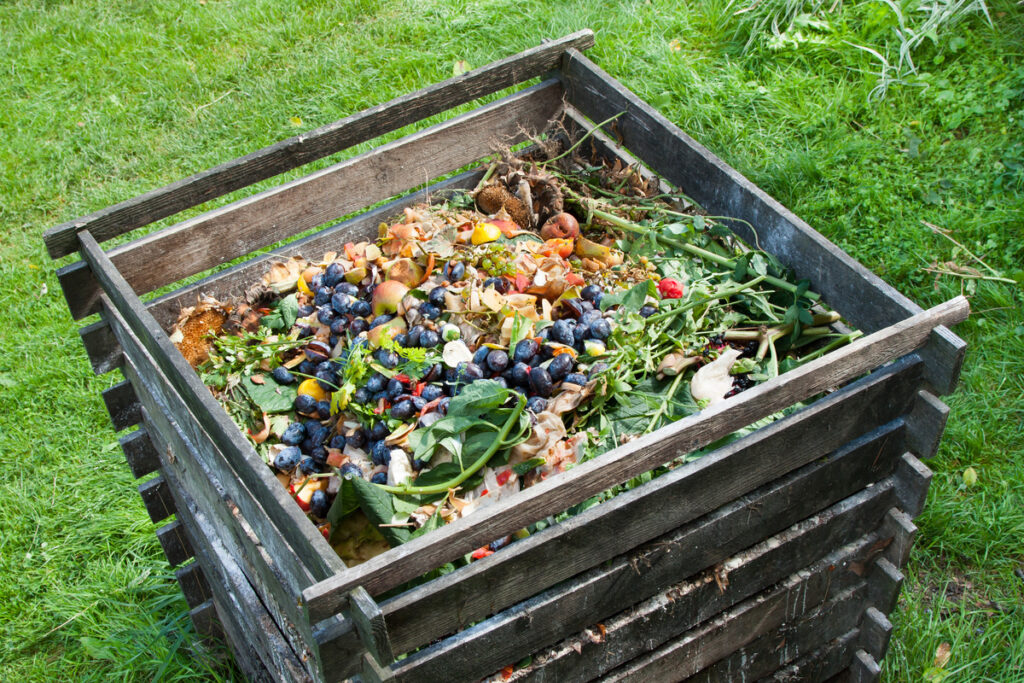
4. MAKE A COMPOST BIN
DIFFICULTY: BEGINNER
SUPPLIES: COMPOST BIN, ORGANIC MATERIAL, SUPPLIES TO BUILD YOUR OWN BIN
If you’ve been looking for ways to boost next year’s garden harvest, autumn is the perfect time to start a compost pile. Compost is a collection of organic materials that break down over time and combine to create an all-natural, nutrient-rich fertilizer.
Anything that is naturally grown out of the earth can be composted. This includes food scraps, lawn clippings, old container soil and roots, and dead leaves – things that are not in short supply in autumn. Compost is a healthy alternative to store-bought additives and fertilizers. Commercial fertilizers come with their own mess of problems like groundwater contamination and can pose health risks if ingested directly by humans and pets. Avoid these issues and lessen your house’s waste by choosing to compost.
Your compost bin can be anything – a trash can, a retired plastic storage container, a wooden DIY compost bin (like this one with plans by Practically Functional), or a hole in your back yard. The first two options are budget-friendly and helpful for large collections, while the DIY project is a fun afternoon activity you can spend doing with your family. The last option employs the dig and drop method of composting which sources the nutrients directly into the soil. All you have to do is dig a large hole in your garden or a trench along the length of your garden and fill it with your organic waste.
Fall is the perfect time to start a compost pile because of its abundance of year-end vegetables, roots, leaves, and seasonal pumpkins, cornstalks, and gourds and because it gives you months for the compost to mature before you need it in the spring. A lot of factors influence how quickly your compost will decompose to its most beneficial level, anywhere from three months to two years. To maintain your compost pile and encourage proper maturation, mix or flip it periodically and ensure it receives enough moisture.
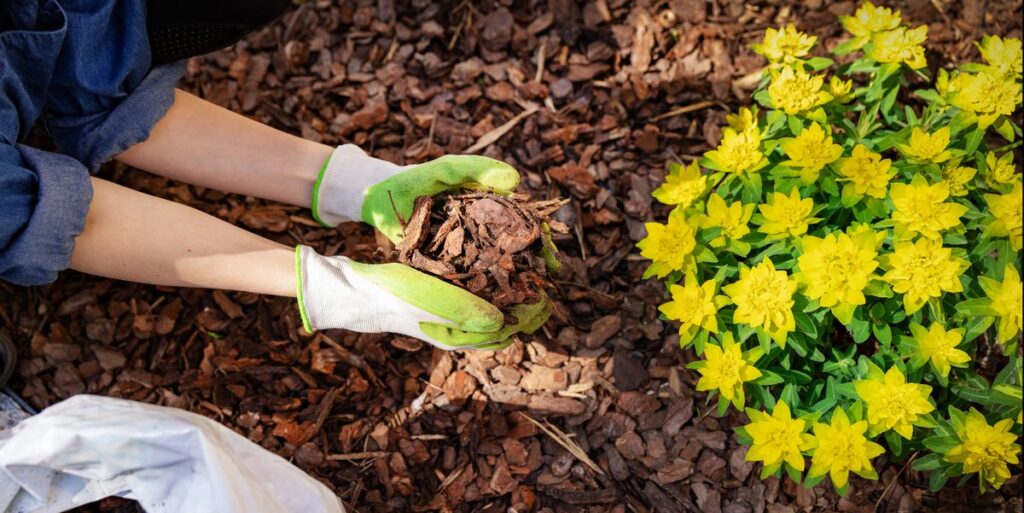
5. REMULCH PERENNIALS
DIFFICULTY: BEGINNER
TOOLS: SCOOP/SHOVEL, RAKE
SUPPLIES: MULCH
Ideally, late spring to early summer is the best time to mulch if you’re doing so for aesthetics reasons, but mulching in the autumn could save you time next spring and help to insulate your plants over the winter. An added layer of mulch placed around your plants during summer helps to protect the base and roots of plants and suppresses unwanted weed growth, but fall mulching accomplishes the same things.
It’s up to you when (or if!) you want to mulch, but many homeowners and lawn care specialists have started placing mulch in the autumn for a few reasons:
- Mulch protects plant roots and insulates soil from the cold winter weather; if you live in a region that experiences cold winters, you should consider mulching in the fall
- Mulch retains soil moisture by allowing little water to evaporate and protects the soil around your plants from eroding due to harsh fall rainstorms and the impending snowstorms
- Mulch helps to control the freezing-thawing cycle that your soil will undergo in the winter, causing your plants less stress than they would face without the mulch layer
- Insulated soil keeps underground insects active as they work to improve the soil
- Autumn is much cooler than spring, so it’s more enjoyable and tolerable to be outside for long periods of time (like when laying mulch!)
- Plants grown with mulch tend to produce healthier flora, crops, or blooms
- Save yourself some time in the sping. Mulch after your region’s first freeze!
The type of mulch is yours – a classic option is dyed or natural shredded wood – but smaller/finer pieces of mulch break down faster, thus restoring nutrients faster. But be sure to buy enough for all of your perennial and tree beds. The Home Depot has an online calculator that can help you figure out how many bags of mulch you will need for your project. It’s essential that you mulch these because even though they’re supposed to grow back every year, they won’t be able to unless they’re properly prepared for the cold. Apply 2 to 3 inches of mulch around the base of your plant’s roots to help prevent the smaller roots closest to ground level from getting frostbite.
Just because the summer is almost over, that doesn’t mean that the fun in your backyard has to stop. These 5 tasks may seem more like maintenance or chores than home ‘projects’, but really, anything that you do to make yourself or your home look/feel better is an accomplishment worth celebrating. By preparing your home for winter now (and even next spring), you’ll be saving yourself time in the future and spend a lovely day outside doing it.
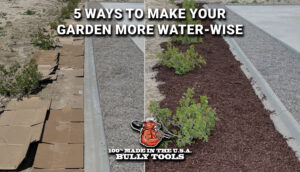
And speaking of saving, we saved you a click! Shop our selection of high-quality hand tools at 100% Made in the USA Bully Tools. We manufacture everything from rakes and shovels to specialty lawn, gardening, and municipal products.