What to Do with Your Summer Harvest
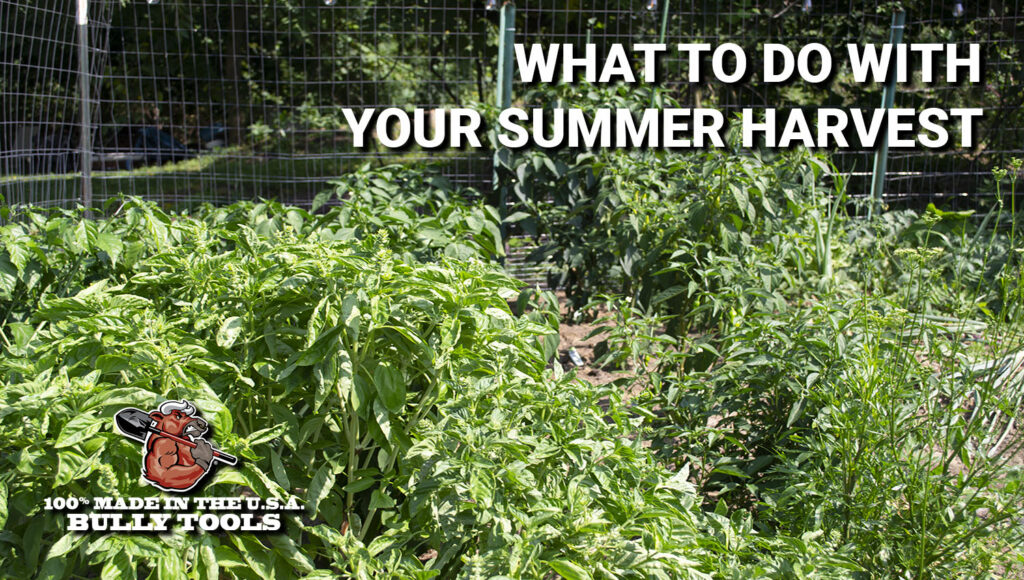
We’ve all done it. You know, grown too many vegetables in your garden and are now left with way more fresh edibles than you and your family could possibly eat.
Planting is great summer fun until all of your produce starts to come in at once! And – that harvest isn’t the last. Fruit and vegetable plants continually produce edibles until the first frost of your region hits (given that you’ve taken care of your plants properly). And so, the struggle to find some way to use all of your produce begins.
HISTORY OF GARDENING
Agriculture and farming date back to the beginning of time. Ever since humans were first able to, they began domesticating and planting crops for themselves, their families, and their communities. The world’s first civilizations harvested their own plants as early as 9500 BC, and in the coming centuries, different crops were being domesticated in different places across the globe. Agriculture intensified during the Bronze Age as members of ancient Greece, China, and Egypt diversified and improved upon their growing styles.
In Europe, gardens began as a basic expression of wealth, aesthetics, and design. Aesthetic gardens of the Renaissance period were thought to bring “order” to nature, as they were constructed with a large emphasis placed on symmetry and detail, but these gardens were not built to bear edibles.
In the Middle Ages, gardening became the main source of food production and medicinal healing, and both of these practices were spearheaded by local monasteries. Still, townspeople grew pleasure gardens, fruit orchards, and herb and vegetable gardens to sustain themselves, trade with others, or sell. It was shortly after this time that transcontinental travel by ship brought new crops into areas through trade.
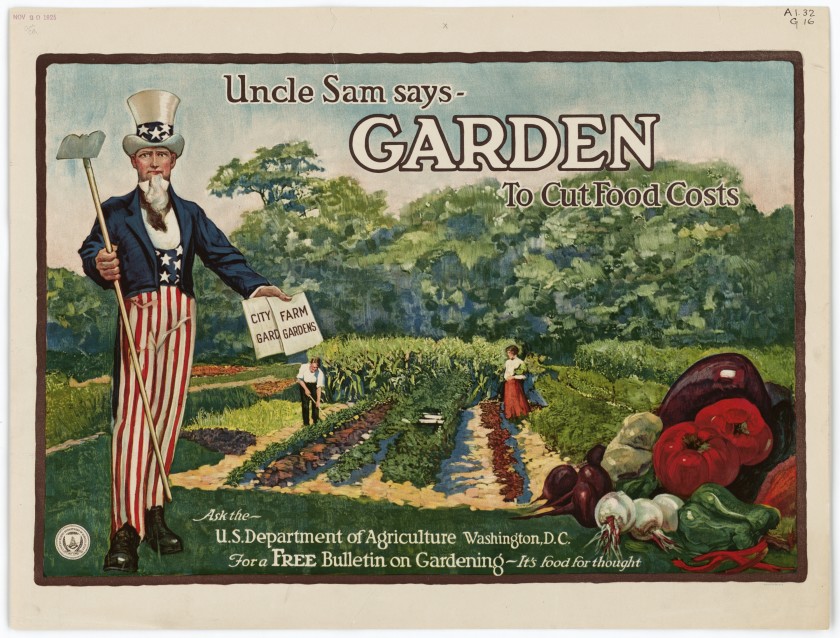
Fast forward to the establishment of the United States: colonists had to adapt to their new terrain and began to grow their own crops. The Indigenous peoples of America had mastered agriculture by this time and advised colonists on how best to grow. Large-scale farming increased productivity during the late 19th to early 20th centuries, and by World War II, at-home gardening skyrocketed in popularity, as Americans in the states could no longer rely on a steady food supply. During this time, about 20 million “Victory Gardens” were planted around the U.S. “and by 1943, these little plots produced 40 percent of all vegetables consumed in the U.S.” – totaling to an estimated 9-10 million tons of edibles.
Since this Green Movement, everyday Americans and citizens across the globe have turned to gardening as a way to unwind, support themselves, live healthier lives, and get in touch with nature.
All in all, gardens were made for sharing: either through what was produced or in the happiness and relaxation that the gardening practice brings. These days, you can find so many different methods of growing that you can sustain yourself, your family, and your friends with vegetables all year round, no matter where you live.
WHAT TO DO WITH FRESH VEGETABLES YOU CAN’T EAT
You should never let fresh produce go to waste! Not only would you be throwing away the sweat equity, time, and money that you put towards growing those plants AND the veggies alongside them, but it seems that every time we go to the grocery store, the price of produce goes up! Here’s what you can do instead:
CAN OR PICKLE
Canning and pickling are both great methods of utilizing your fresh fruits and vegetables, and it lets you try out something new in the kitchen. Both of these practices date back for centuries, and since that time, the methodologies have been perfected. While most of the mechanics are the same, canning and pickling are different.
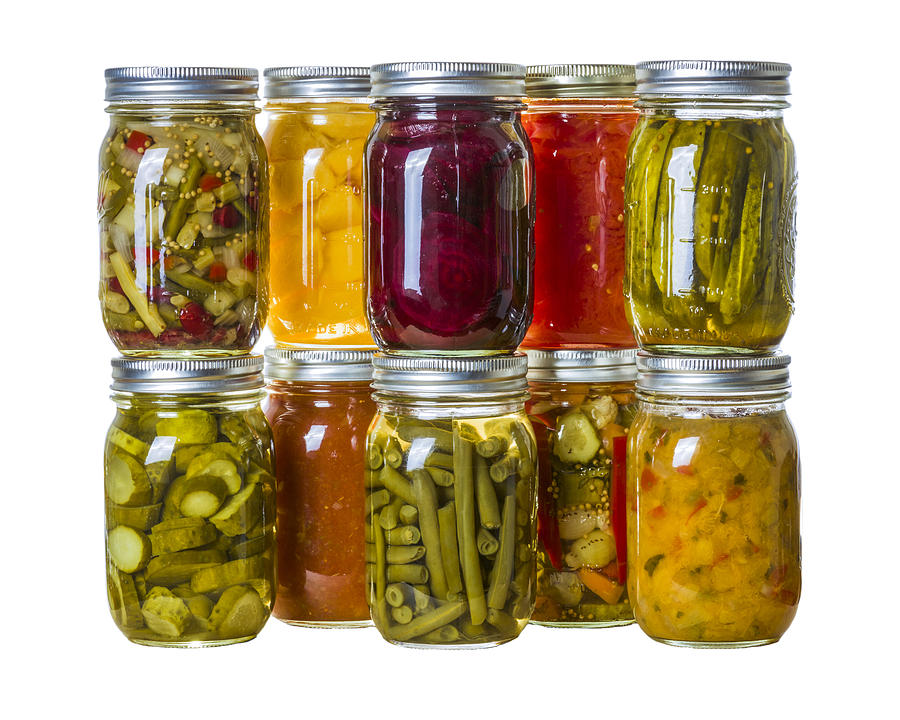
Both preserve food and allow you to enjoy your home-grown crops for up to 5 years if stored properly, but the two methods do so differently. Canning involves hot-packing, or cooking the food before it is canned, and a sealing process. Pickling involves cold-packing, or placing uncooked food in a can and then filling it with a brine (typically vinegar), and over time, the food will ferment.
If you grew an abundance of cucumbers and like store-bought pickles, try to make your own! Specialty pickles are expensive too, but you can craft your own recipes and flavors by making a unique brine, adding herbs, spices, and aromatics, or switching up slicing methods. But – you don’t have to stop there. You can pickle onions, beets, squash, green beans, or anything else you’d like.
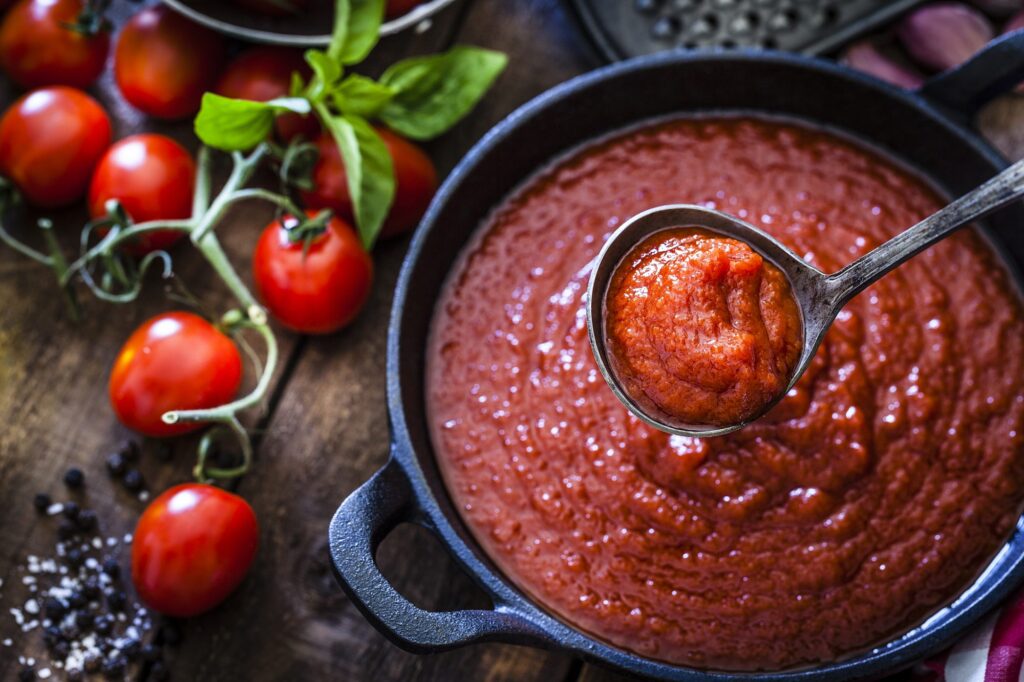
The list of fruits and vegetables to can is endless. Highly acidic crops like tomatoes and fruits can especially well because the acidity prevents bacterial growth and allows you to enjoy them longer, but you can can peppers, okra, corn, potatoes, mushrooms, and beans too!
You can find recipes for canned fruits and vegetables, brines, jams, salsas, jellies, and more online, and additional resources for safe canning can be found on the National Center for Home Food Preservation‘s website.
BLEND IT
Other ways to utilize multiple fruits and vegetables is by making sauce, salsa, jam, jelly, hot sauce, or relish. These creations will require preserving, but they’re relatively easy to make and delicious to enjoy. Tomato sauce and salsa are both tomato-based, so if you have an abundance of those, you’re already ahead of the game. Likewise, salsa and hot sauce are great ways to use any peppers that you grew. You can also use store-bought tomatoes if your plant didn’t take or the tomatoes didn’t grow well and combine them with homegrown onions, peppers, garlic, and herbs for your own creation.
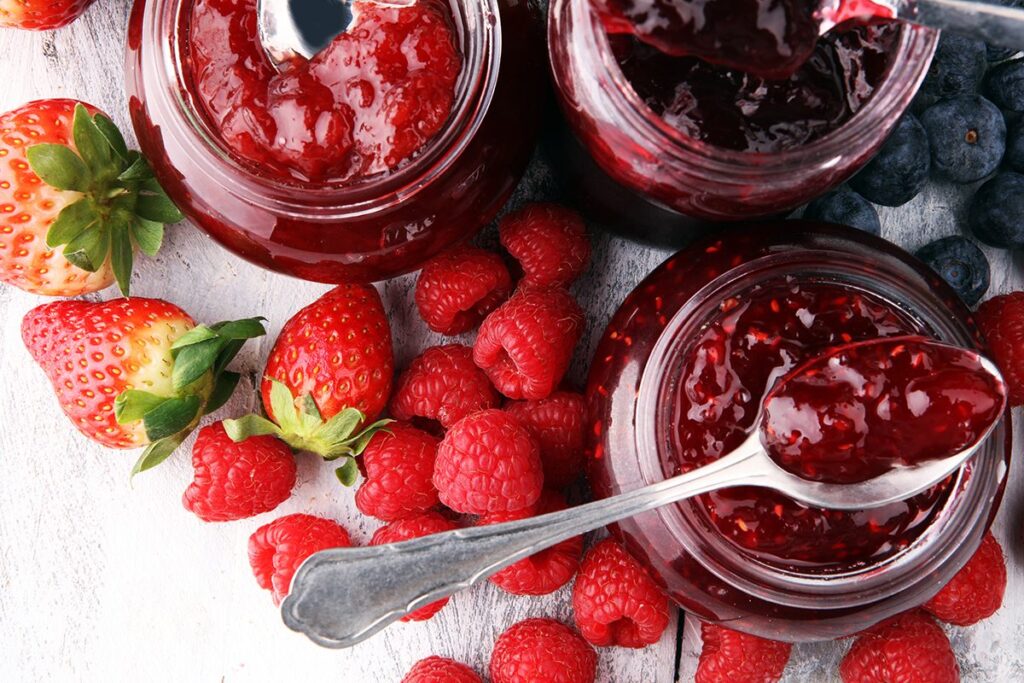
If you want to enjoy the berries you grew all year long, you can make jam, jelly, marmalade, or fruit preserves. These are delicious and pair well with bread or whatever you’re cooking for breakfast, lunch, or a snack. For these fruit spreads, the main ingredients are the fruit of your choice, sugar, and fresh lemon juice (for the acidity!). After you cook, you can seal your spread in jars to keep for up to 2 months. However, you don’t have to can your jam if you want to enjoy it in the coming weeks.
Don’t want to take the time necessary to preserve your fruits and vegetables? There are plenty of ways to enjoy them while they’re still fresh. Aside from the traditional salad, you can find new ways to use your garden edibles:
- Use lettuce as a substitute for taco shells, hamburger buns, or sandwich bread
- Stuff peppers with meat to make stuffed peppers
- Blend fresh fruit for smoothies or smoothie bowls
- Make soup
- Make your own chips or french fries with homegrown potatoes
- Decorate plates with fruit or vegetable garnishes
- Garnish drinks and cocktails with fresh fruit and herbs
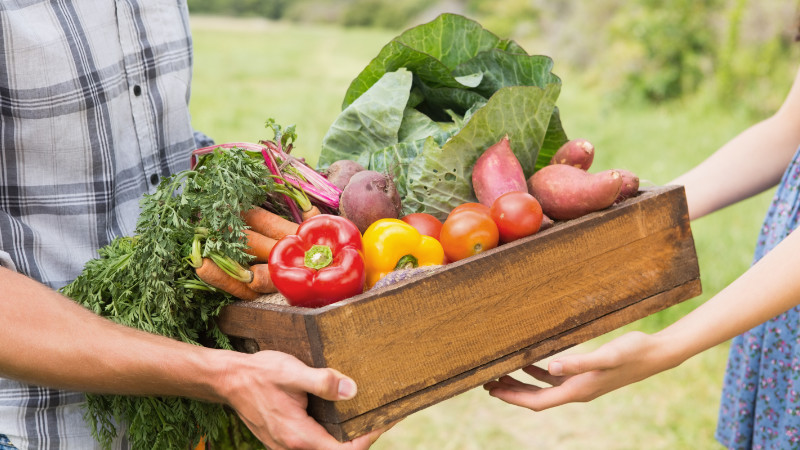
SHARE WITH FRIENDS
Our go to option is always to share! Find friends, family members, and neighbors to give your fresh produce to. If they grew a garden themselves, they may pass on the popular vegetables to grow ie. tomatoes, lettuce, cucumbers, etc. But! If you grew one of your favorites like zucchini, hot peppers, okra, or anything else, offer your extras up to someone who didn’t grow them.
In that same theme, if you and your friends grew entirely different crops, suggest a swap! Gardening has always been a passion that is easy to share.
HOW TO PROPERLY PICK
Improper picking technique can result in you damaging your plant which could prevent new edibles from growing. Using a gentle touch and knowing how to pick is the best way to avoid this, and after all – what’s the point of carefully tilling, growing, and caring for your plant if you don’t harvest from it properly?
As you pick your first batch of edibles from their vines, you’re sure to notice even more unripe fruits or vegetables still growing. By harvesting correctly, you will encourage new growth and prevent harming the plant, and by the end of your growing season, you will have a lot of fruits and veggies on your hands.
Here are our tips to accomplish just that:
TOMATOES
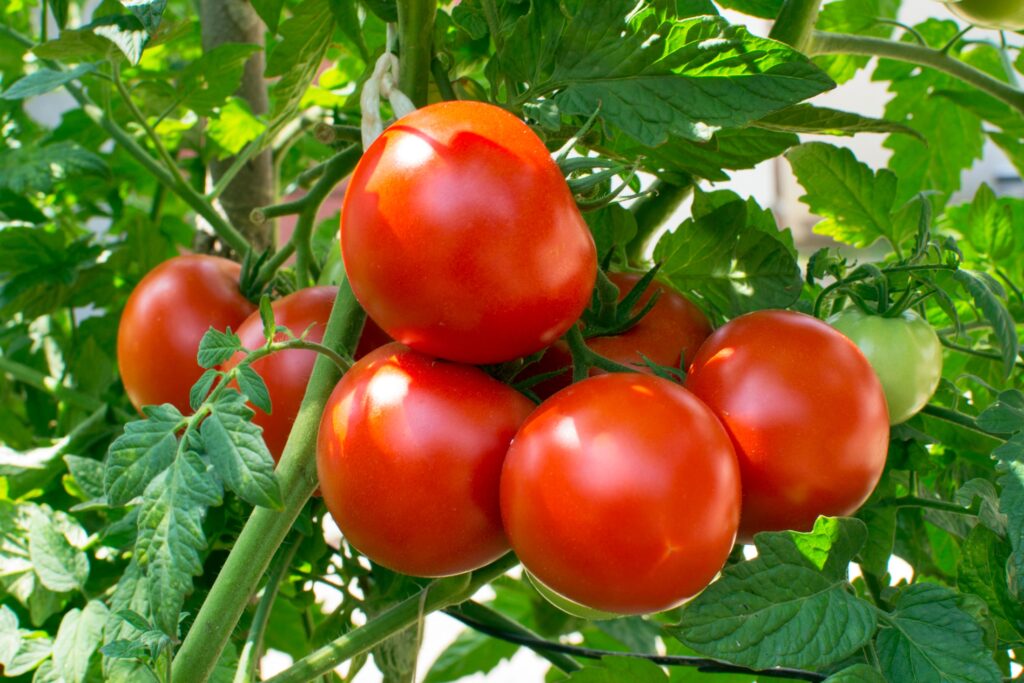
There are a lot of varieties of tomatoes to choose from before you plant – ie. cherry, roma, beef, etc. Cherry tomatoes are the smallest type of tomato, and they grow off of vines in a large bush. It’s astounding how large a single tomato plant can grow, and it’s even more astounding how many tomatoes it will produce! To pick cherry tomatoes, gently pull them from their vine when they are a bright red color.
Now, tomatoes do not have to be red to harvest. A lot of people enjoy green tomatoes, as they have a different flavor, but you can also pick half green/ half pale red tomatoes when they’re in their “breaker stage”. These can then be ripened in a sunny windowsill or in a brown bag over a few days.
For larger tomatoes, a little more force is required to separate it from the vine but be careful of knocking any other unripe tomato from its vine.
CUCUMBERS

Cucumbers come in seedless and seeded varieties. Seedless cucumbers will grow to be longer and skinnier than their seeded counterparts, as these typically grow to be shorter but thicker in diameter. To pick cucumbers, simply hold onto the vegetable and twist it off of its vine. Be careful though, a seeded cucumbers’ skin will be covered in small, white prickles. When harvesting these, you can wear a glove to prevent discomfort. Harvest these whenever they reach your desired size or 8-9 weeks after planting.
POLE BEANS
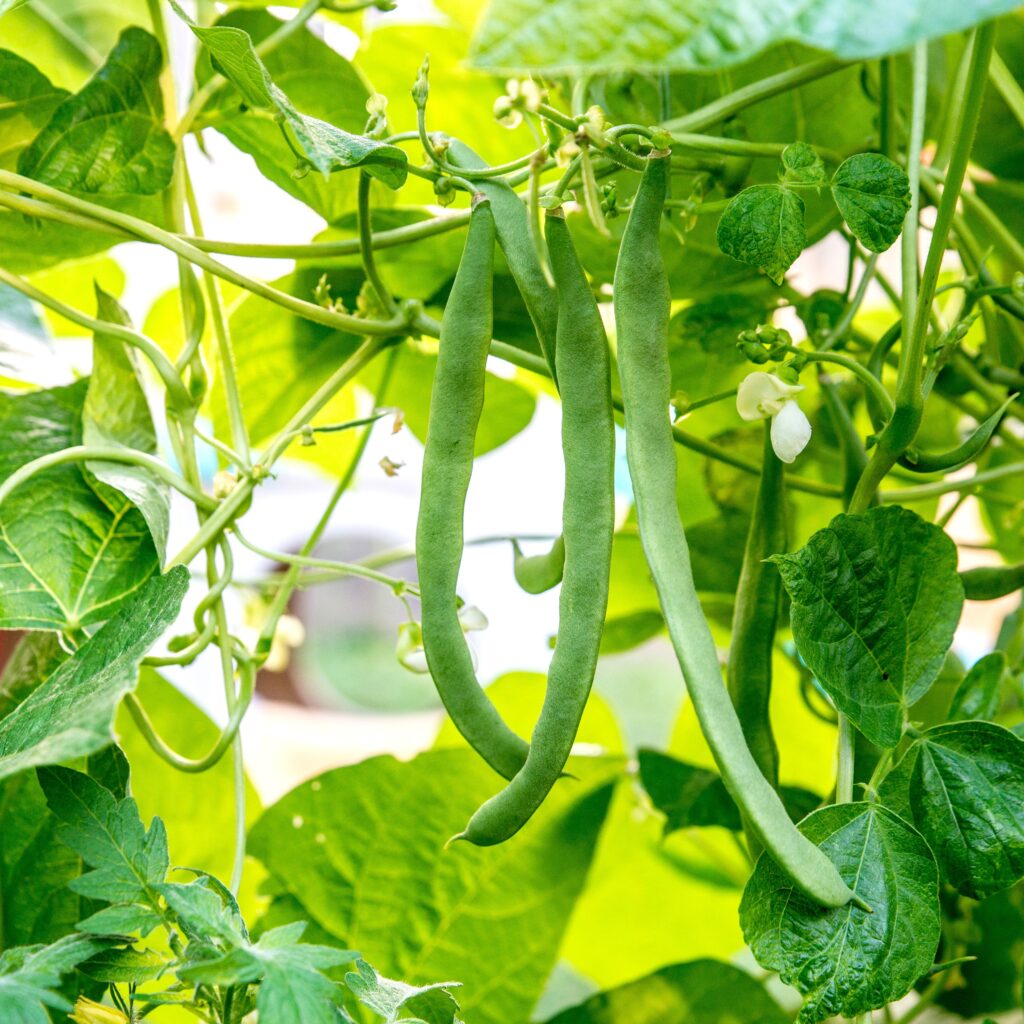
Beans will be ready to harvest approximately 65 days after planting. Pole beans like bush beans or green beans grow in long, green pods, and they should snap easily off of their vine as you pick. To harvest, right where the pod meets the plant, either simply cut with a small garden knife or use your thumbnail to snap the connection point.
PUMPKINS & SQUASH
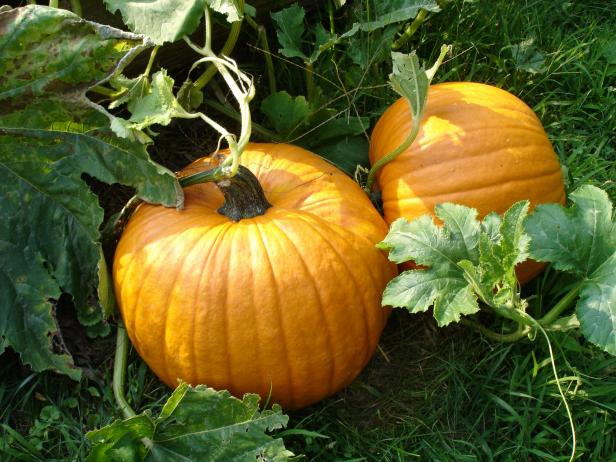
Harvest your pumpkins when they reach your desired size. Baby varieties, which are small and ideal for table decor and homemade pumpkin pies come fall, are typically ready to take indoors about 105 days after planting. To harvest, cut the fruit from the vine leaving an inch to 2-inch stem. Over time, the cut will heal, and once inside, the pumpkin will need to cure for 10 to 14 days.
PEPPERS
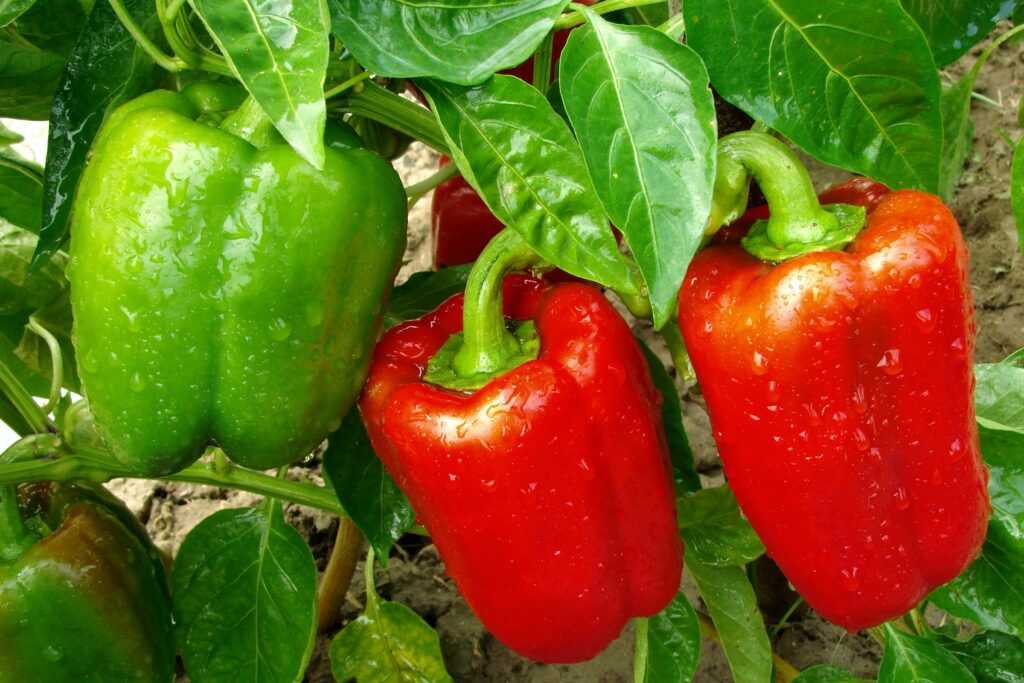
Peppers are a unique vegetable because not only do the different varieties differ wildly in shape and color, they also differ in flavor and heat. So, it is utterly important to closely read the information on the care tag or back of the seed bag before planting.
Depending on the variety of pepper you grow, you can usually judge when one is ready to pick based on its appearance. Cut the pepper off of its vine with a pair of scissors or a garden knife, while still leaving a decent stem.
STRAWBERRIES
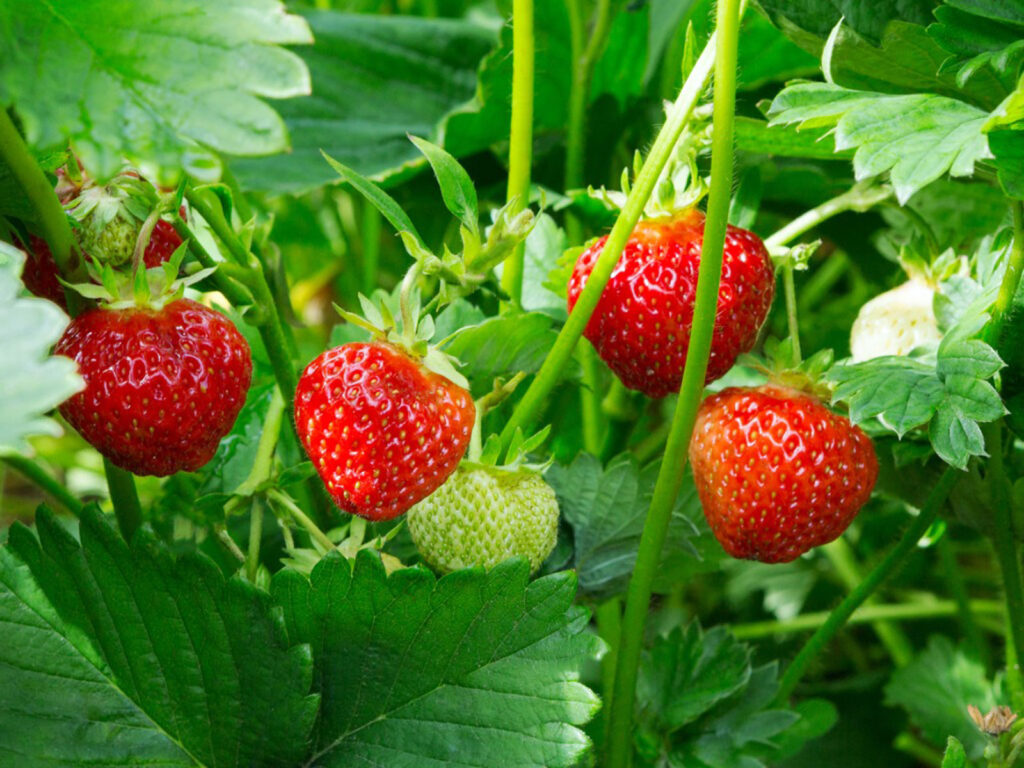
Harvest strawberries when they are adequately sized and bright red, approximately 25 days after the plant is fully bloomed. You can do so by gently pulling and twisting the stem about a quarter-inch above the fruit. The strawberry should separate easily from the rest of the plant, but be careful to not bruise the plant during the harvesting process. Bruising will cause that piece to rot faster and the flavor profile to change.
BROCCOLI
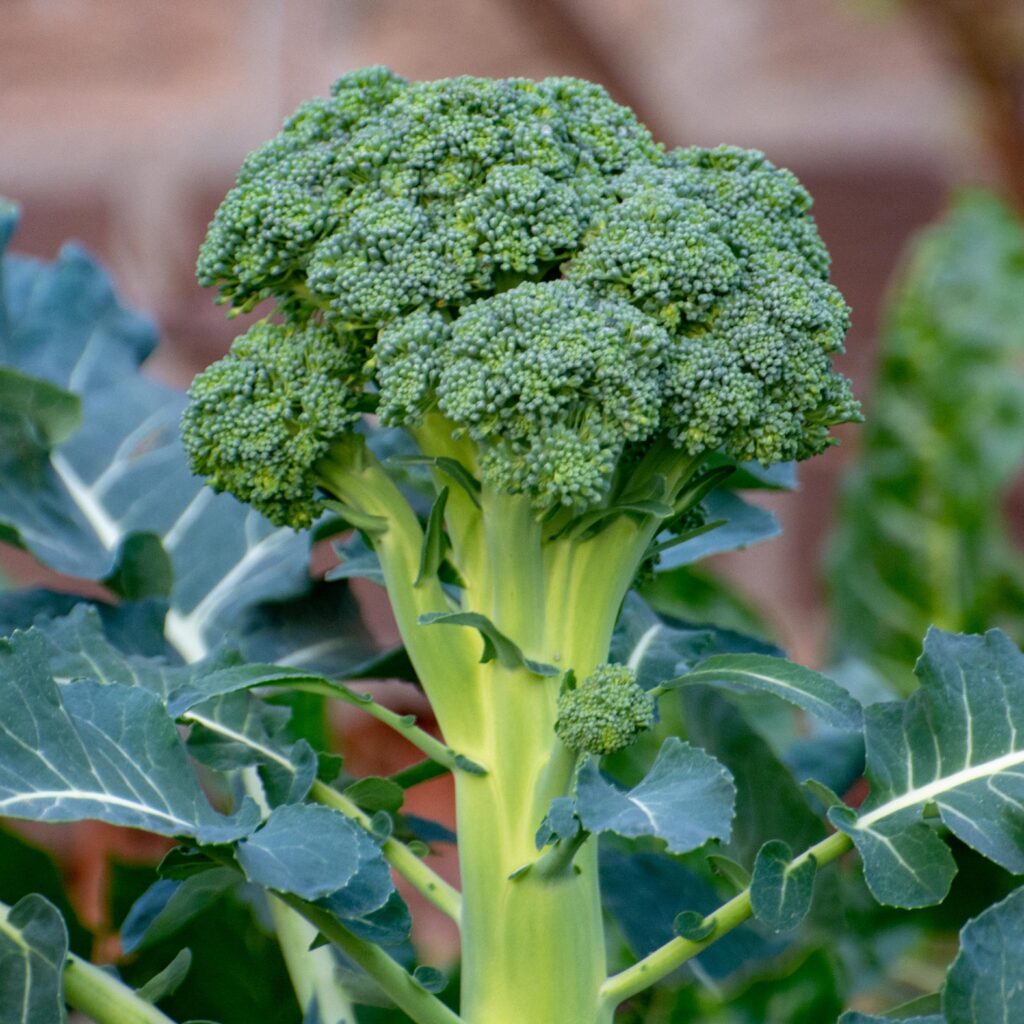
If cut properly, you can get two to three harvests out of a single broccoli plant. Broccoli is comprised of the head and side shoots. When the head is fully matured ie. deep green in color with dense florets, cut the head from the plant at an angle so that water can seep into the stalk and produce new heads. Cuts should be made quickly and smoothly, as sawing at the plant can damage it and discourage growth.
Cut side shoots a few inches below their head. Be sure to harvest before your broccoli sprouts yellow flowers.
CAULIFLOWER
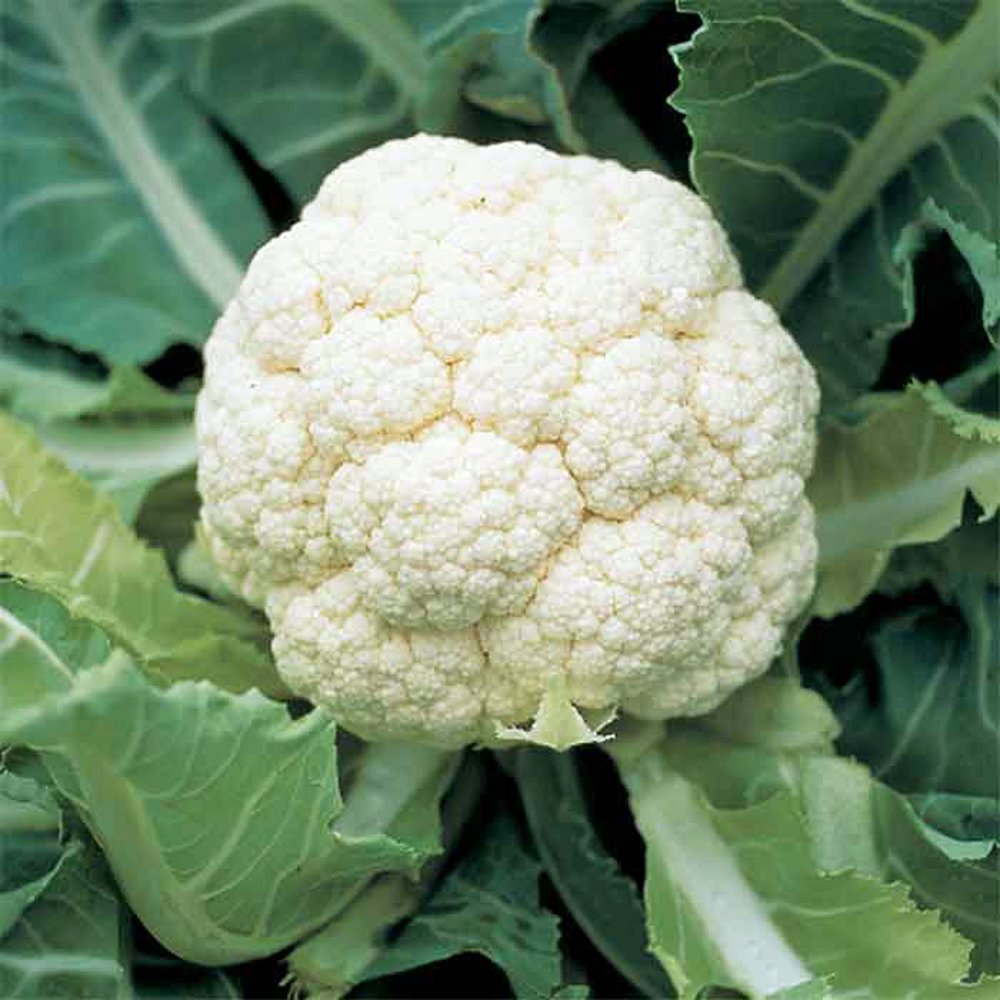
Like broccoli, cut the cauliflower head from the stalk at an angle. This encourages new growth and prevents water from pooling on top of the fibrous stalk. Also, be sure to leave a few leaves to protect the new crops coming in. A mature cauliflower will be firm, compact, white, and ready to harvest 70 to 90 days after planting.
After taking it inside, be sure to soak the head in saltwater (Gardening Know How suggests 2 tablespoons of salt for 1 gallon of water) to expel cabbageworms and other pests.
POTATOES
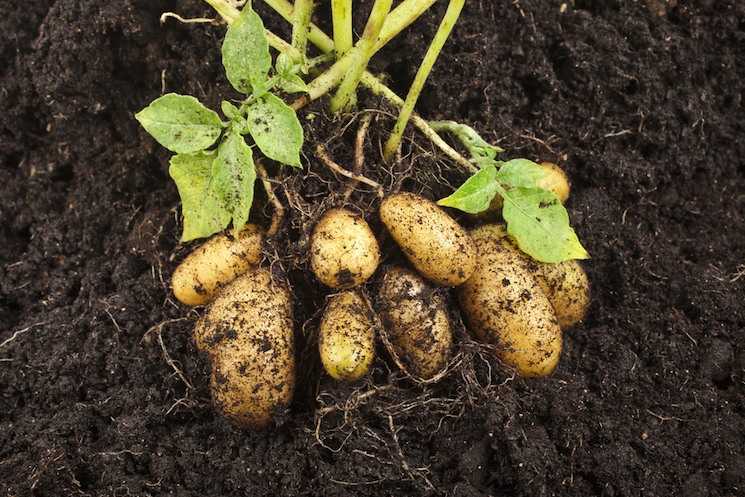
There are many varieties of potatoes that you can grow that vary in size, color, and texture. Check to see the average maturity time of your variety to know when to harvest.
No matter the kind though, harvest only after the foliage on top of the potatoes has died; this is the best way to know if your potatoes are fully mature. Use a spading fork or small shovel to carefully lift the plant from the ground and remove the potatoes. The skins should be tough and firmly attached to the flesh.
RADISHES
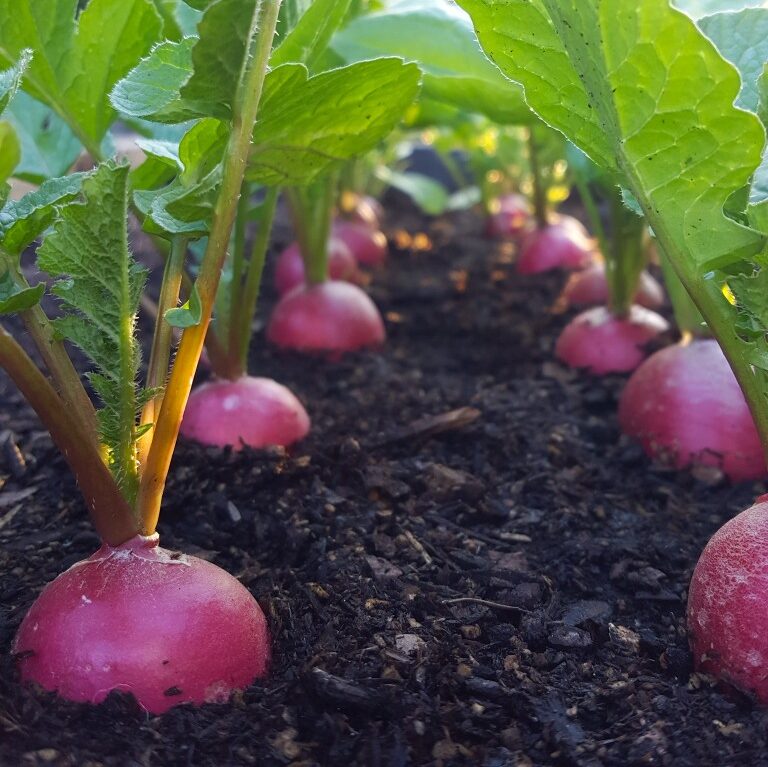
Radishes reach maturity as early as three weeks after planting. Radishes are root vegetables, so all of the magic occurs underground. Like onions, radishes will eventually grow through the surface soil. Harvest when the root is about one inch in diameter by gently pulling out of the ground.
CARROTS
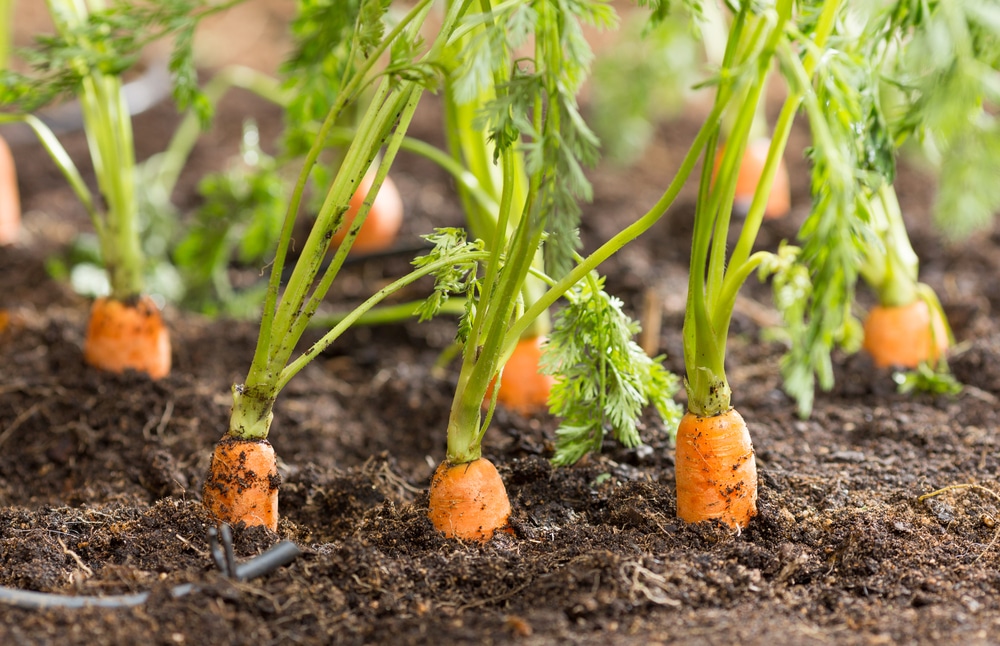
Another root vegetable, carrots are easy to grow and usually ready to be pulled 60-80 days after planting. The top of the carrot that peaks out of the ground should be bright orange in color and 3/4-inch to 1 inch around. When harvesting, be careful not to rip off the leafy tops.
EGGPLANT
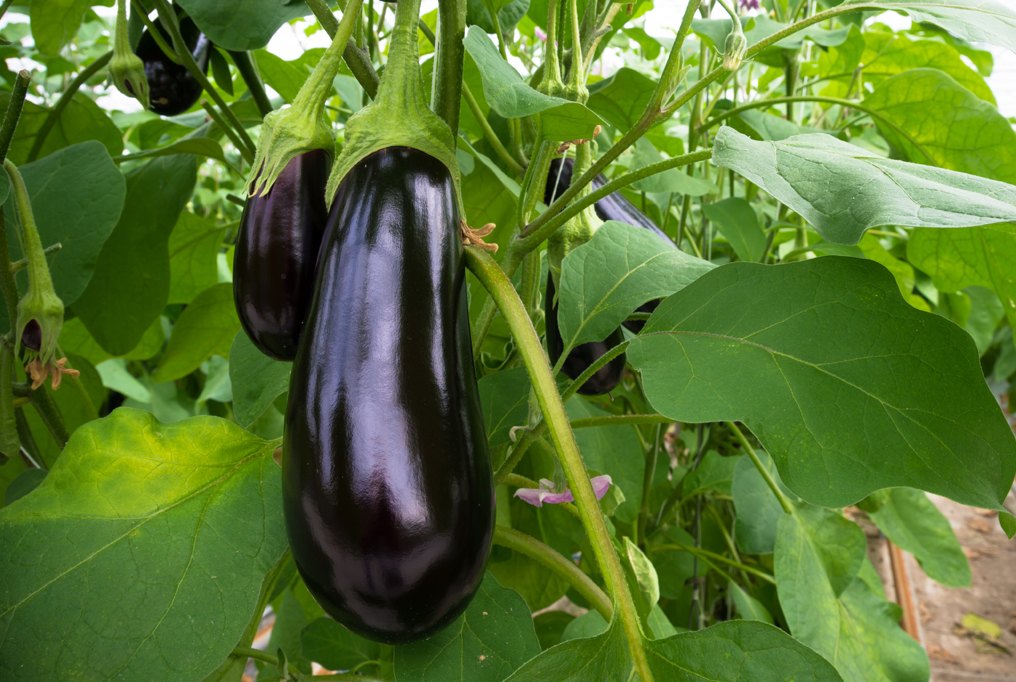
An eggplant will be deep purple, glossy, and plump when it is fully matured. You should leave each to grow until it reaches the size most desirable to you, but the longer an eggplant is left on the vine, the more bitter becomes. To harvest, use garden shears or a sharp knife to cut the fruit from the vine. Leave a short stem on top of the eggplant, and be gentle as eggplants bruise easily.
ZUCCHINI

Zucchini plants can grow incredibly wide along the base of your garden and produce edible vegetables and flowers. To harvest the vegetables, use a knife or pair of pruners to cut the stem from the plant. A zucchini is edible at any size, but it’s best to harvest when it is between 5 to 7 inches in length.
Zucchini is a spreading plant, so it’s easy to miss new fruit under the mass of vines and leaves. Be sure to check under the leaves for new fruit and throw away or compost any rotten vegetables as you come across them.
And, don’t forget about the flowers of a zucchini plant! There are tons of ways to prepare them, and to harvest these, cut the flower from the plant, leaving an inch of stem. Be wary of removing too many flowers, though. The plant needs these for pollination and continual growth, but raw or cooked, the flowers are a delightful added treat.
LETTUCE
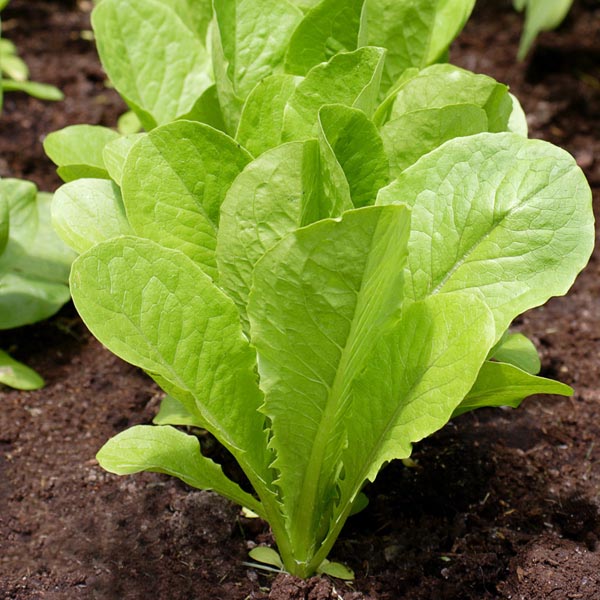
Harvested lettuce will need a good wash once it comes inside. No matter the variety that you grew, you should pick lettuce before it reaches maturity, as younger leaves taste best and are most tender. If you want your lettuce plant to continue to produce, cut the head about an inch above the soil surface. You can also pick individual pieces of lettuce once fully formed starting with the outside leaves.
SWISS CHARD
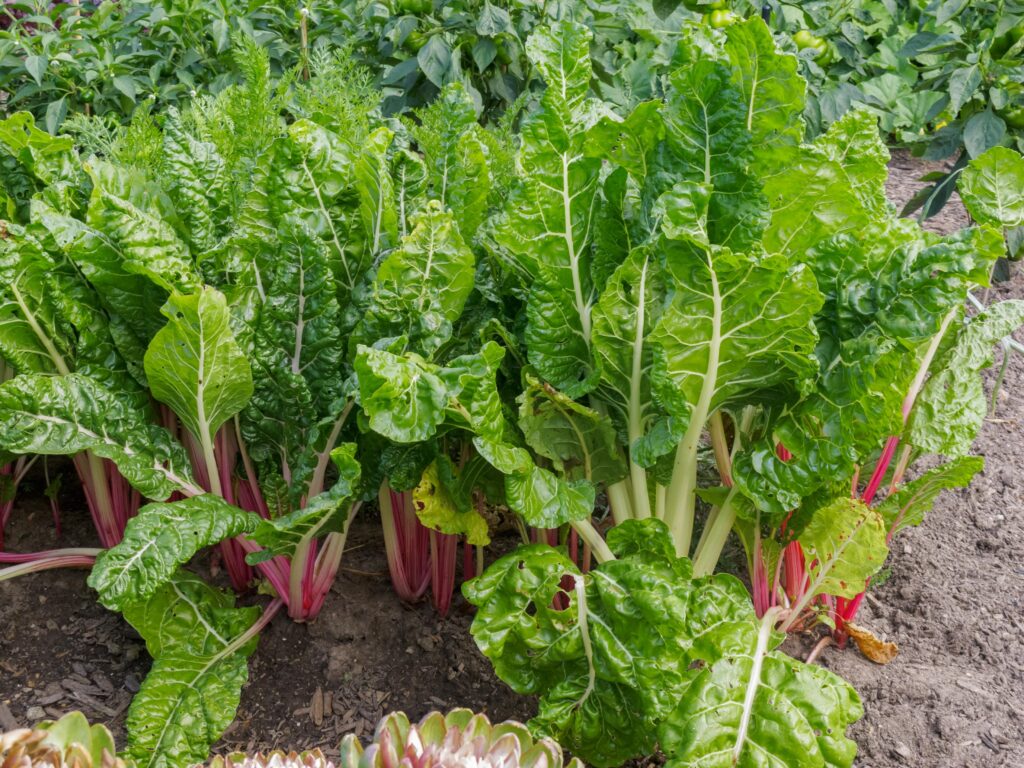
It may surprise you, but swiss chard is a member of the beet family. The stalk will grow to be a pale red color with thick green leaves on top. Swiss chard can grow to be between one and two feet tall and is edible at any height, but for the best tasting leaves, cut them once they reach between 8 to 12 inches. Use a sharp knife or pair of garden shears to sever the leaves at least two inches above the soil.
ONIONS/GREEN ONIONS
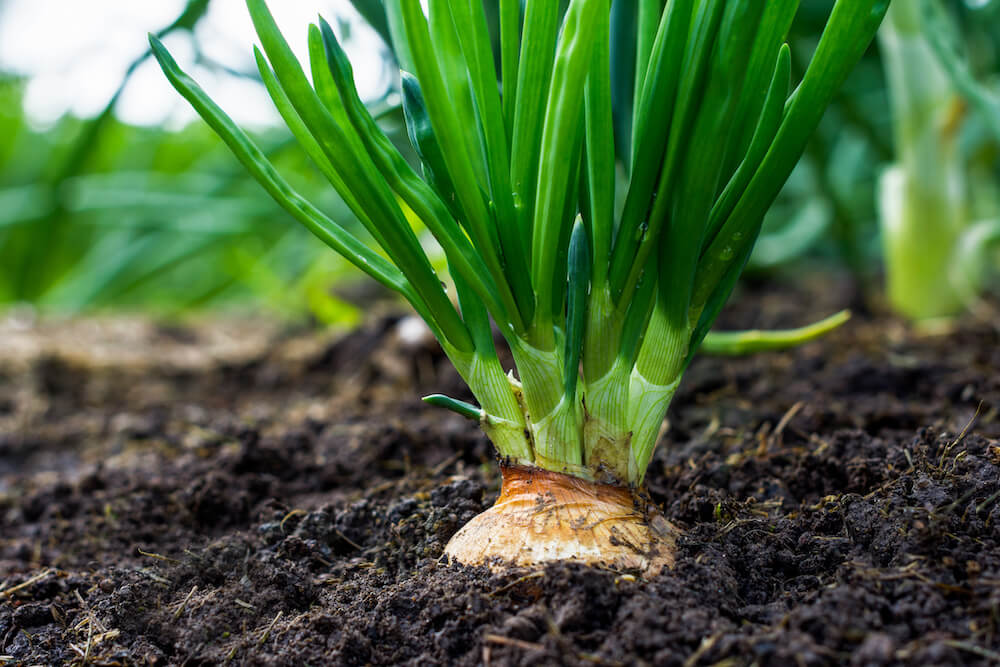
Onions are an awesome vegetable to plant because they produce a tasty onion bulb and milder tasting leaves. These leaves are actually onions themselves, sometimes called green onions or scallions. To harvest, simply pull the onion out of the ground as needed. The top of the bulbs will peak out of the soil as it nears maturity, so you can see the size of onion you’re about to pick. Scallions taste best when under 10 inches in length.
SPINACH
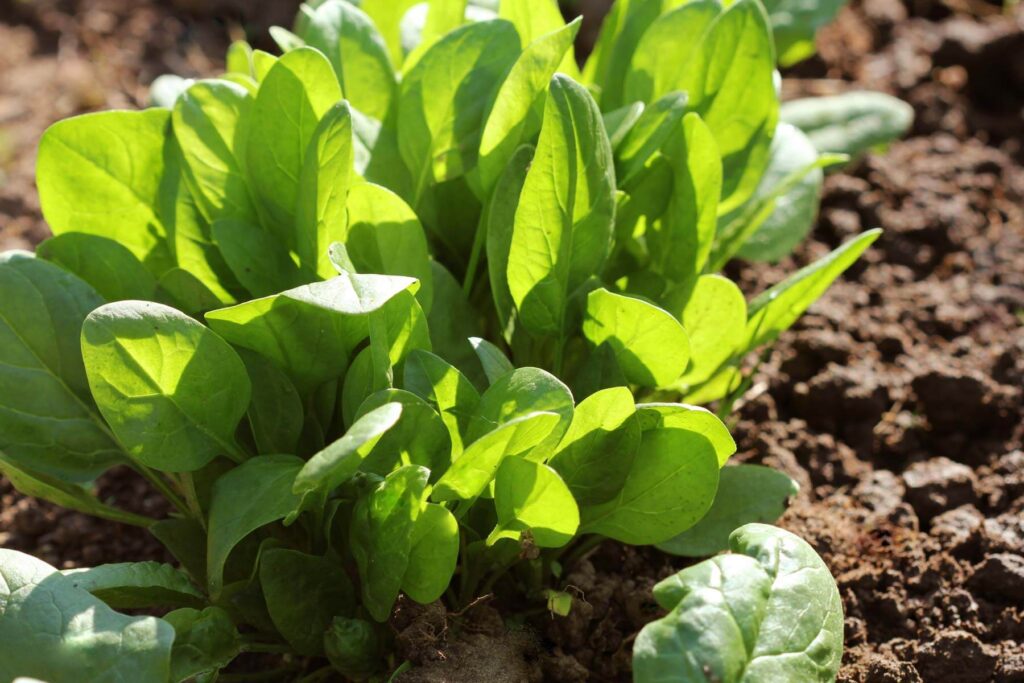
To harvest spinach, cut or gently pluck the leaves at the stem. Begin with the outer, older leaves if you only plan to harvest a handful or two at a time, or you can cut the entire plant off right above the base. Spinach is fast-growing and is usually ready to pick 40 days after sowing.
FINAL THOUGHTS
If the Coronavirus pandemic has taught us anything, it is that you can’t rely on grocery stores for quality food. The shortages that we saw early on and the increase in prices that we are experiencing now prove that growing at home is the most reliable way to feed your family. Better and fuller harvests will come with time and growing experience, but there has never been a better opportunity to share the wealth of a garden than now. It’s a little late in the year to begin a new outdoor garden now if you live in a region that experiences cool frosts in late autumn, but there are a lot of resources online that can guide you through the structure of year-round planting.
If you’re thinking ahead to next year, read our articles on How to Prepare Garden Soil for Planting and our 8 Steps to Keeping a Healthy Garden for more ideas, information, and advice on summer planting. And as always, if you need some reliable hand tools to help dig, weed, till, or maintain your garden plot or outdoor area, look no further than the selection at 100% Made in the USA Bully Tools. We manufacture over 100 products from rakes, hoes, spades, and shovels for your lawn and garden to specialty municipal and winter tools.
Good luck and happy gardening!